Step 1 : Press the Smart Hub button from your remote.
Step 2 : Search for the IPTV Smarters Pro to install.
Step 3 : Log in the Application with your subscription details i.e. Username, Password, Portal URL.


(1) Unlock your Android device and go to Play Store (Google Play).
(2) Browse for XCIPTV Player in the Google Play Store.
(3) Select Install to install XCIPTV Player on your Android device.
(4) Launch the IPTV player.
5) You have successfully installed XCIPTV APK on your device!
Enter your IPTV service login credentials and click Sign In when finished.

(6) Done! Enjoy

Step 1: Start by downloading Smarters Player Lite app from the Apple Store through this URL :
https://apps.apple.com/in/app/smarters-player-lite/id1628995509
or you can search for it on App store
install the app on your IOS device.
Step 2: Open the app once downloaded and Enter the login details.

Step 3: Enter the login details that we have provided you after you get a subscription with us
Now Click on “ADD USER” to proceed to the next section.
Step 4: Wait some seconds.
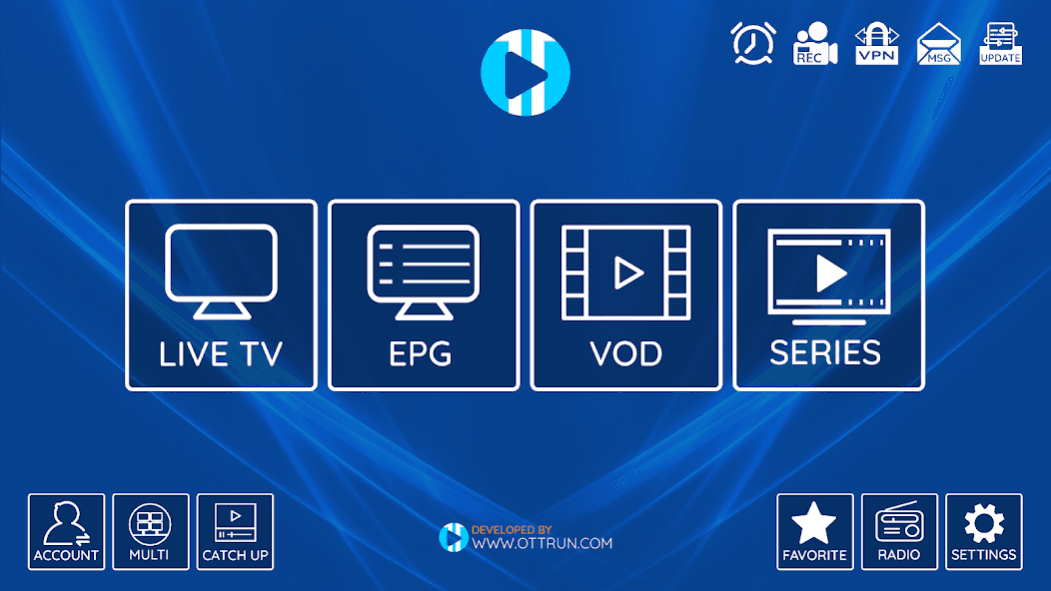
Step 5: Now click on “Live TV” icon as depicted in the image via a red arrow.

Step 6: Now you must select the channel group that you want to watch and proceed to the next section.
Step 7: Now you must click on the channel name and then double click on the small screen to turn into full screen as the final step.
Step 8: To add EPG no need to add any EPG url, Just click on “Install EPG” .
Done

Install IPTV Smarters Pro on Fire TV Stick
From the home screen of your device, hover over the Find option.
1.
– On the home screen of your FireStick, you will find the menu bar on the top
In the menu bar, select Settings

In the Settings, choose the option My Fire TV

– When the following set of options are displayed on the next screen, click Developer Options

5. In the Settings, choose the option My Fire TV
– Now, you need to check whether Apps from Unknown Sources is OFF or ON
Click it once if it is OFF

– A quick warning message is displayed
To keep Apps from Unknown Sources switched on, click Turn on

With this, you have configured the FireStick settings to allow the installation of IPTV Smarters and other third-party apps. Follow the steps below:
We will first install the Downloader app
This app will help you sideload IPTV Smarter on FireStick (because browser downloads are not allowed)
Highlight the Search option on the home screen of FireStick
Type the name of the app (which is Downloader)
Click the Downloader option when it is displayed in the search results
Choose the Downloader icon on the following screen and download and install the app

You may now open the Downloader app
When you run this app for the first time, a set of prompts will appear. Dismiss them until you see the following screen
On this screen, you need to click the URL textbox on the right side (make sure the Home option in the left menu is selected) where it says ‘http://’

Go ahead and enter the following path on this window: https://iptvsmarters.com/smarters.apk
Click GO

Give it a minute or two until the IPTV Smarter is downloaded onto your FireStick device

When the download has completed, the Downloader app will run the APK file and the installation will start
Click Install

Installation is concluded with the App installed notification
You may now choose to click OPEN and get started with IPTV Smarters
I recommend choosing DONE so that you may first delete the APK file and save some space on the FireStick storage

This tutorial will guide you through a simple and effective steps of installation your Mag
BOX MAG500A, MAG520w3, MAG522w3, MAG524w3, MAG 540w3, MAG 420, MAG 522, MAG 500A ).
Step 1: Go to Settings
On main menu Click on Settings

Step 2: From Settings Click on System Settings

Step 3: Once you are on system settings, next step would be Network, Click on Network and Connect your box to Internet either via Wifi which is wireless or Directly to Ethernet via cable.

Step 4: Once you are connected to Internet, It’s now time to find your Mac Address. You MAC Address starts with 00:1A:79, this number you can find in the back of the box or inside the box in settings, take a note of it and pass it to Sharktv.ca team either on our LIVE CHAT or when you Signup for iptv service for your MAG BOX MAG500A, MAG520w3, MAG522w3, MAG524w3, MAG 540w3, MAG 420, MAG 522, MAG 500A.
Step 5: Go back to System Settings to activate your IPTV Service for MAG BOX

Step 6: Navigate to Servers tab

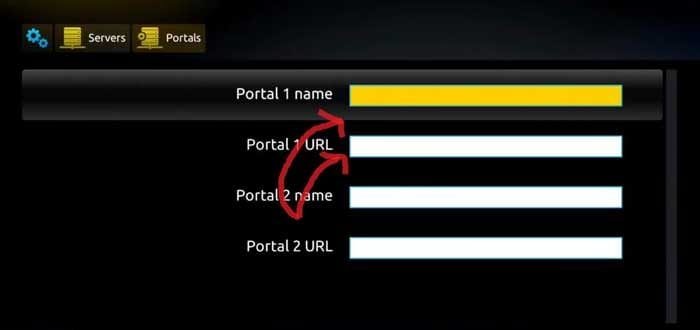
Step 7: Click on Portals

Step 8: We are almost done, now you need Portal Name and Portal URL. Once your payment is confirmed, one of Sharktv.ca team memebers will send you portal Information either via LIVE CHAT or your email. You must type portal Name and Portal URL in the below boxes and click save.
Step 9: Click on restart portal and
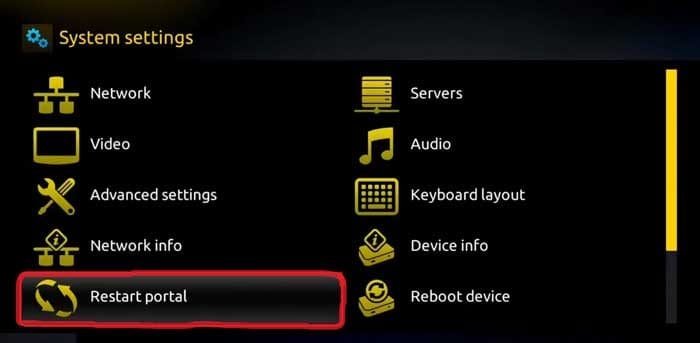
Step 10: If you did everything right, you should see a yellow bar running in the middle of the screen after your Portal restart. You can now watch all live tv channels using your brand new MAG BOX.